Topic Content:
- Meaning of Orthographic Projection
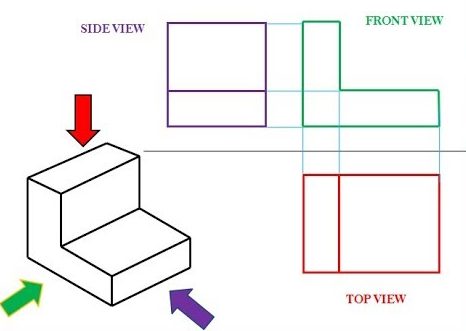
Orthographic projection is a method of drawing an object by means of plane views. While isometric projection drawing looks at all the three views (or faces) of an object together, orthographic projection looks at the same three views separately but linked together.

You are viewing an excerpt of this Topic. Subscribe Now to get Full Access to ALL this Subject's Topics and Quizzes for this Term!
Click on the button "Subscribe Now" below for Full Access!
Subscribe Now
Note: If you have Already Subscribed and you are seeing this message, it means you are logged out. Please Log In using the Login Button Below to Carry on Studying!


Thanks for the lesson.
The lessons are awesome!
How can I download them?
Was helpful
Thanks for the note
Keep it up